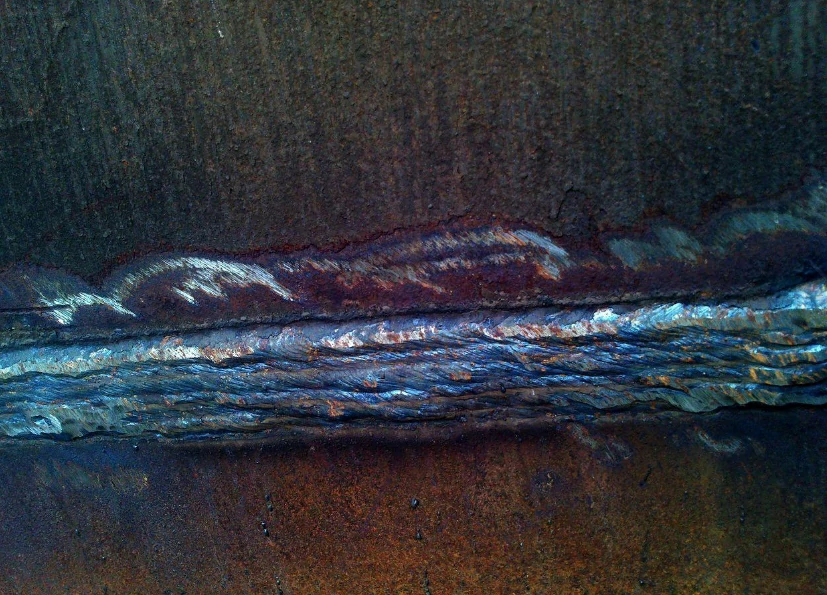
Welding cracks are defects that can compromise the structural integrity and performance of welded joints. Understanding the types of welding cracks, their causes, and detection methods is crucial for ensuring the quality and reliability of welded structures. This article provides a detailed overview of the various types of welding cracks, their underlying causes, and the techniques used to detect them.
Why Do Welds Crack?

The development of cracks in welds is a complex phenomenon, typically stemming from internal stress exceeding the strength of the weld material. Several factors contribute to this increased stress, including improper heat treatment, weld geometry, stress concentration, and material properties.
When delving deeper into the role of stress, we find that both physical loads and residual stress play pivotal roles in the initiation and propagation of weld cracks. Residual stress, which often arises from the expansion and contraction of materials during welding, inherently weakens the weld joint. Meanwhile, physical loads, such as extreme vibration, tension, compression, and flexing, directly act on the weld, causing it to crack.
Residual stress, in particular, originates during the welding process when the material undergoes thermal expansion and subsequent contraction. If the weld material or base material is not sufficiently robust to withstand these forces, internal cracks may form. Over time, as the weld joint ages and is repeatedly subjected to extreme loads, its ability to sustain physical stress diminishes.
Types of Welding Cracks
Welding cracks can be broadly classified into two categories: hot cracks and cold cracks. These categories are based on the temperature range in which the cracks form.
1. Hot Cracks
Hot cracks, also known as high-temperature cracks, occur at elevated temperatures during the solidification of the weld metal. They usually form when the weld pool solidifies and contracts. Hot cracks are typically intergranular and are found along the grain boundaries. There are several subtypes of hot cracks:

Centerline Cracks (Segregation Cracking or Bead Shape Cracking)
Centerline cracks, also known as segregation cracks or bead shape cracks, occur along the centerline of the weld bead. They form during the solidification phase of welding when the molten weld metal begins to cool and contract.
Causes
- Segregation: The presence of low-melting-point impurities such as sulfur, phosphorus, or lead can lead to segregation at the grain boundaries. These impurities can weaken the weld and cause cracking.
- Improper Weld Shape: A concave weld bead or excessive weld reinforcement can increase the likelihood of centerline cracking due to uneven cooling and solidification.
- High Welding Speeds: Excessive welding speeds can lead to a narrow and deep weld pool, promoting segregation and centerline cracking.
Crater Cracks
Crater cracks occur at the end of a weld bead, typically forming when the welding arc is terminated. They appear as small cracks or fissures in the crater left by the welding arc.
Causes
- Rapid Cooling: The sudden cessation of heat input can cause rapid cooling and contraction of the weld metal, leading to crater cracks.
- Improper Termination: Failing to fill the crater adequately before stopping the welding process can leave a weak spot prone to cracking.
- Contaminants: The presence of contaminants or impurities in the weld pool can exacerbate crater cracking.
Longitudinal Cracks
Longitudinal cracks run parallel to the weld bead and can occur in both the weld metal and the heat-affected zone (HAZ). They are a type of hot crack that forms during solidification or due to residual stresses.
Causes
- High Residual Stresses: Uneven heating and cooling can induce high residual stresses in the weld, leading to longitudinal cracks.
- Improper Joint Design: Poor joint design or fit-up can create stress concentrations that promote longitudinal cracking.
- Material Properties: Materials with a high coefficient of thermal expansion or poor weldability are more susceptible to longitudinal cracking.
Lamellar Tearing
Lamellar tearing is a type of cracking that occurs in the base metal, parallel to the weld fusion line. It is characterized by the separation of metal layers due to the presence of non-metallic inclusions.
Causes
- Non-Metallic Inclusions: The presence of sulfides, oxides, or other inclusions within the metal can act as stress concentrators and initiate lamellar tearing.
- Transverse Stresses: High transverse stresses, especially in thick plates, can cause lamellar tearing.
- Weld Orientation: The orientation of the weld relative to the rolling direction of the base metal can influence the likelihood of lamellar tearing.
Solidification Cracks
Solidification cracks occur in the weld metal during the solidification phase of welding. They typically manifest along the centerline of the weld bead, where the metal is the last to solidify.
Causes
- Low-Melting-Point Impurities: The presence of impurities such as sulfur, phosphorus, or lead can segregate to the grain boundaries during solidification, creating weak spots that are prone to cracking.
- High Welding Speeds: Excessive welding speeds can lead to a narrow and deep weld pool, increasing the likelihood of solidification cracks due to rapid cooling and contraction.
- Improper Weld Joint Design: Joint designs that create high restraint or insufficient filler material can lead to uneven shrinkage and stress concentration, promoting crack formation.
Liquation Cracks
Liquation cracks occur in the heat-affected zone (HAZ) of the base metal. These cracks are caused by the partial melting of the base metal adjacent to the weld pool, which fails to solidify properly upon cooling.
Causes
- Partial Melting: When the base metal near the weld pool partially melts, it creates a localized zone with a lower melting point. Upon rapid cooling, this zone may not solidify uniformly, leading to cracking.
- Rapid Cooling: Fast cooling rates can prevent the molten material in the HAZ from solidifying properly, resulting in cracks.
- Impurities: Similar to solidification cracks, the presence of impurities can exacerbate the formation of liquation cracks by lowering the melting point of the base metal in localized areas.
2. Cold Cracks
Cold cracks, also known as low-temperature cracks or delayed cracks, occur after the weld has cooled to room temperature. They are usually transgranular and can form in both the weld metal and the HAZ. The primary subtypes of cold cracks include:

Hydrogen-Induced Cracks (HIC)
Hydrogen-induced cracks (HIC), also known as hydrogen embrittlement cracks, occur when hydrogen is absorbed into the weld metal during the welding process and later diffuses to areas of high stress, leading to cracking.
Causes
- Hydrogen Sources: Moisture, oil, grease, or other contaminants on the base metal or welding consumables can introduce hydrogen into the weld pool.
- High Residual Stresses: Rapid cooling and high residual stresses can promote the diffusion of hydrogen to stress concentration points, causing cracks.
- Low-Temperature Welding: Welding at low temperatures can increase the solubility of hydrogen in the weld metal, exacerbating the problem.
Heat-Affected Zone (HAZ) Cracking
HAZ cracking occurs in the region adjacent to the weld metal, where the base metal has been thermally affected but not melted. These cracks are often associated with changes in the metallurgical structure and residual stresses.
Causes
- Rapid Cooling: Quick cooling rates can lead to brittle microstructures in the HAZ, making it susceptible to cracking.
- High Residual Stresses: Uneven heating and cooling can introduce high residual stresses in the HAZ, leading to cracking.
- Material Properties: Some materials, such as high-strength steels, are more prone to HAZ cracking due to their metallurgical characteristics.
Toe Cracks
Toe cracks occur at the junction of the weld metal and the base metal, often at the toe of the weld bead. These cracks are typically surface cracks but can propagate into the weld or base metal.
Causes
- High Residual Stresses: Stress concentrations at the toe of the weld can lead to cracking.
- Poor Welding Technique: Inadequate welding practices, such as improper welding angles or excessive heat input, can contribute to toe cracking.
- Material Properties: Some materials are more susceptible to toe cracking due to their metallurgical characteristics.
Root Cracks
Root cracks occur at the root of the weld, where the weld metal meets the base metal at the back side of the weld joint. These cracks can be internal or external and often originate due to inadequate penetration or other welding defects.
Causes
- Inadequate Penetration: Insufficient penetration of the weld can leave voids or weak spots at the root, leading to cracking. This can result from low heat input, improper welding technique, or incorrect joint design.
- High Residual Stresses: Stress concentrations at the root of the weld can lead to cracking. These stresses are often due to thermal contraction during cooling, improper fit-up, or welding sequence.
- Contaminants: The presence of contaminants such as moisture, oil, or dirt at the root of the weld can weaken the joint and cause cracking. Contaminants can be introduced from unclean base materials, welding environment, or improper storage of welding consumables.
Residual Stress Cracks
Residual stress cracks occur due to the residual stresses that develop during the welding process. These cracks can form in both the weld metal and the heat-affected zone (HAZ).
Causes
- High Heat Input: Excessive heat input during welding can lead to high residual stresses as the weld cools and contracts. High heat can cause large grain growth and create zones with different cooling rates.
- Improper Welding Sequence: Welding sequences that do not adequately control heat distribution can lead to residual stress buildup and cracking. This includes poor planning of weld passes and inadequate preheating or post-weld heat treatment.
- Material Properties: Materials with high residual stress sensitivity, such as high-strength steels, are more prone to cracking. These materials may have lower ductility or specific metallurgical characteristics that make them more susceptible to residual stresses.
Transverse and Fusion Line Cracks
Transverse cracks are cracks that run perpendicular to the direction of the weld bead. These cracks can occur in the weld metal or the heat-affected zone (HAZ) and are typically associated with high residual stresses or external loads that act perpendicular to the weld.
Fusion line cracks occur along the fusion line, which is the interface between the weld metal and the base metal. These cracks can develop due to inadequate fusion during the welding process, leading to weak spots that are prone to cracking under stress or thermal cycling.
Causes
- High Residual Stresses: Stress concentrations perpendicular to the weld bead can lead to transverse cracking. These stresses can be caused by uneven cooling, shrinkage, or external loads.
- Poor Weld Fusion: Inadequate fusion between the weld metal and the base metal can result in fusion line cracks. This can be due to insufficient heat input, improper welding technique, or incorrect joint preparation.
- Material Properties: Some materials, such as those with high hardness or low ductility, are more prone to transverse and fusion line cracking due to their metallurgical characteristics.
Weld Cracking Causes and Remedies
Understanding the different types of welding cracks as well as production causes and implementing appropriate remedial measures are essential to prevent these defects. The following provide remedies for various welding cracks to alleviate them.
Material Selection
Different metals and alloys exhibit varying degrees of sensitivity to cracking, depending on their yield strength, ductility, and other material properties. When welding two dissimilar metals, it’s essential to understand their relative strengths and choose suitable filler materials and welding techniques to achieve a robust bond.
Steel, stainless steel, and aluminum are among the most commonly welded materials, but they each have unique challenges. Steel and stainless steel are prone to hydrogen-induced cracking, which occurs when hydrogen diffuses into the weld zone and creates internal stresses that exceed the material’s ductility. Aluminum, on the other hand, is more susceptible to hot cracking due to its high thermal conductivity and springback tendency.
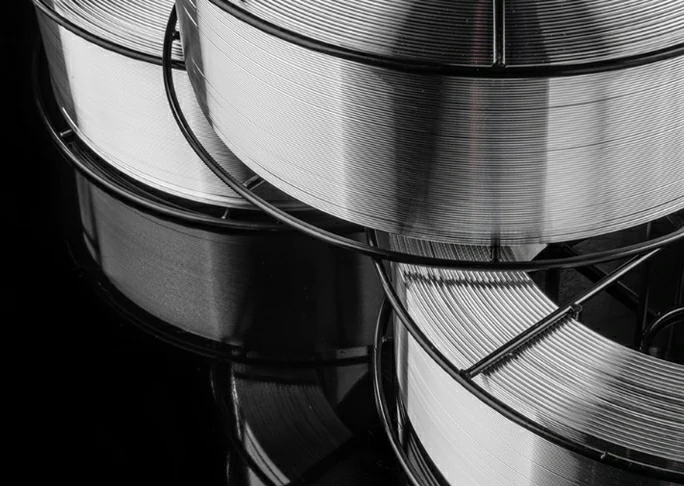
To prevent cracking, it’s essential to consult a filler metal selection chart and choose a filler metal that matches the base metal’s chemical composition and mechanical properties. Additionally, using welding techniques that minimize the introduction of hydrogen, such as low-hydrogen welding electrodes or gas-shielded welding processes, can help reduce the risk of hydrogen-induced cracking.
Temperature Changes
Temperature changes during welding are a major cause of cracking. As the weld joint is heated, it expands due to thermal expansion. However, as the weld cools and solidifies, it contracts or shrinks, creating internal stresses that can exceed the material’s ductility and lead to cracking.
To mitigate the risk of cracking due to temperature changes, several strategies can be employed. Using welding techniques that minimize heat input, such as pulsed welding or short-arc welding, can help reduce the amount of heat introduced into the weld zone. Additionally, preheating the base metal before welding can help reduce the temperature gradient and minimize the internal stresses that develop during cooling.
Clamping and fixtures can also be used to constrain the weldment and prevent it from contracting excessively during cooling. Weld mapping techniques, which involve welding in a specific sequence to minimize residual stresses, can also be effective. Finally, post-weld heat treatment can be applied to relieve residual stresses and improve the weldment’s resistance to cracking.
Avoid High Sulfur Steel and Certain Beads
It’s essential to avoid welding high sulfur content steel due to its susceptibility to hot cracks. Sulfur, boiling at approximately 239 degrees Fahrenheit, tends to accumulate towards the weld centerline during liquefaction, causing cracks upon solidification.
Additionally, steer clear of extremely concave or convex welding beads. Concave beads may not properly deposit filler metal, potentially leading to cracks from inadequate reinforcement. Conversely, excessive filler in convex beads can also cause cracks due to internal stress during metal expansion. Opt instead for regular beads with a slight convex or concave shape for better good weld integrity and reliability.
Residual or Applied Stresses
Weld cracking often stems from stress concentrators like improper joint preparation, contaminants, or tungsten inclusions. Excessive use of intermittent welds also heightens risks, as each stop-start point can foster cracks. Prevention demands strict processes, clean workspaces, and meticulous attention, hallmarks of skilled welding.
Remediation involves grinding out affected areas to sound metal and laying a new weld, albeit laborious and costly. Addressing root causes is crucial to avoid recurrent failures and ensure weld integrity.
Chemical Makeup
The chemical makeup of the base metal and filler material plays a significant role in weld cracking. For example, stainless steel contains chromium, which helps form a protective oxide layer that resists corrosion. However, chromium can also react with hydrogen during welding, leading to the formation of brittle phases within the weld metal that are prone to cracking.
On the other hand, aluminum’s high thermal conductivity and low melting point make it susceptible to hot cracking. Environmental factors such as humidity and contamination can also impact aluminum’s weldability by introducing impurities that promote crack formation.
To mitigate the effects of chemical makeup on weld cracking, it’s important to choose materials with low impurity levels and optimize the welding process to minimize the introduction of harmful elements. Additionally, using welding consumables that are compatible with the base metal can help reduce the risk of crack formation.
Slow Down the Cooling Process
To minimize weld cracking, it’s essential to slow down the cooling rate. Slower cooling enhances hydrogen diffusion, allowing hydrogen to escape from the weld metal, thereby reducing the risk of cracks.
One effective method to achieve this is using a heat blanket. Heat blankets provide consistent and controlled heat to the weld area, slowing the cooling process. Welding ovens are another solution, where the entire welded component is placed inside an oven to ensure uniform and gradual cooling. Induction heating is also employed by some welders. This process uses electromagnetic induction to heat the metal, allowing precise control over the cooling rate.
Detection Methods for Welding Cracks
Detecting welding cracks is crucial for ensuring the integrity of welded structures. Various non-destructive testing (NDT) methods are employed to identify cracks in welds. The most common methods include:
- Visual Inspection: Visual inspection is the simplest and most widely used method for detecting surface cracks. It involves a thorough examination of the weld surface using the naked eye or magnifying tools. While visual inspection can identify surface cracks, it is not effective for detecting subsurface defects.
- Dye Penetrant Testing (DPT): Dye penetrant testing is a method used to detect surface-breaking cracks. It involves applying a liquid dye to the weld surface, allowing it to penetrate into cracks, and then removing the excess dye. A developer is then applied, which draws the dye out of the cracks, making them visible under UV light or regular light.
- Magnetic Particle Testing (MPT): Magnetic particle testing is used to detect surface and near-surface cracks in ferromagnetic materials. The weld is magnetized, and magnetic particles are applied to the surface. Cracks disrupt the magnetic field, causing the particles to accumulate at the defect sites, which are then visible under proper lighting conditions.
- Ultrasonic Testing (UT): Ultrasonic testing uses high-frequency sound waves to detect internal cracks. A transducer emits sound waves into the weld, and any discontinuities reflect the waves back to the transducer. The reflected waves are analyzed to determine the presence and location of cracks.
- Radiographic Testing (RT): Radiographic testing involves using X-rays or gamma rays to create images of the weld. Cracks and other defects appear as dark spots on the radiograph. RT is effective for detecting internal cracks and other subsurface defects.
- Eddy Current Testing (ECT): Eddy current testing is used to detect surface and near-surface cracks in conductive materials. An alternating current is passed through a coil, generating eddy currents in the material. Cracks disrupt the flow of eddy currents, which are detected and analyzed to identify defects.
Is a Welding Crack a Defect or Just a Discontinuity?
In welding, distinguishing between defects and discontinuities is essential. A discontinuity is a flaw that may not necessarily compromise weld integrity. It only becomes a defect if it violates specific code requirements or in-house quality standards, necessitating repair.
Defects always qualify as discontinuities, but not all discontinuities are defects. Defects, such as cracks or significant porosity, require correction due to their potential to cause failures. Discontinuities, like minor surface irregularities, may be acceptable if they meet relevant standards.
Qualified inspectors evaluate discontinuities using methods like visual inspection, ultrasonic testing, or radiographic testing to determine their impact. Even if a discontinuity meets code standards, customer specifications might still require its repair to ensure the highest quality and safety.
Who Bears Responsibility for Preventing Welding Cracks?
- Welder’s Responsibilities: The welder is responsible for defects stemming from skill level or welding technique. Issues like incomplete fusion, excessively concave or convex bead contours, and improper weld size often arise from poor technique, incorrect travel speed, improper electrode manipulation, or incorrect parameter settings. Additionally, welders must notify supervisors of any issues encountered during the job.
- Supervisor’s Responsibilities: Supervisors must ensure that welders have the necessary tools and resources to perform effectively. This includes maintaining a safe working environment in compliance with OSHA regulations, providing the correct base and filler metals, ensuring proper weld procedure testing, and supplying functional welding equipment. Effective training programs and properly designed, accessible weld joints are also critical.
- Design and Management Considerations: Beyond welders and supervisors, design-for-manufacturability issues also impact weld quality. Designers must ensure joint accessibility, allowing welders to position and manipulate their tools correctly. If a design makes it difficult to access the weld area, it increases the risk of defects.
How Can Undercut Defects Lead to Welding Cracks?
Undercut defects, where base metal thickness is reduced at the weld interface, disrupt stress transfer and create potential stress concentration points that can initiate cracks, especially under high stress conditions.
To prevent these defects. For constant-voltage processes like non-pulsed GMAW and flux-cored arc welding, manual adjustment of voltage is possible. In constant-current processes such as GTAW and SMAW, voltage varies with arc length, necessitating careful management. Correct electrode angles and reduced travel speeds also help ensure effective weld deposition and minimize undercut, thereby reducing the risk of welding cracks over time.
Does Cold Lapping Lead to Welding Cracks?
Cold lapping, or overlap, presents a significant risk in welding practices. When the weld toe fails to fuse with the base metal, creating a discontinuity, stress transfer through the weld joint is compromised. This lack of continuity acts as a stress riser, potentially initiating cracks under operational loads.
To prevent cold lapping, ensuring uniform electrode manipulation between the base metals is critical. Uneven distribution can lead to inadequate fusion and overlap, particularly problematic in scenarios where welding is performed without clear visibility of the joint.
According to AWS standards, achieving a smooth transition at the weld toe is paramount. This practice promotes even stress distribution and helps mitigate the formation of detrimental cracks, thereby ensuring the overall integrity and durability of welded structures.
Conclusion
Understanding the types of welding cracks, their causes, and detection methods is crucial for ensuring high-quality welds. By employing proper welding techniques, using clean materials, and implementing appropriate preheat and post-weld heat treatments, the risk of welding cracks can be minimized.

Let’s Start A New Project Today
Our engineers will contact you within 2 hours.
FAQ
Welding cracks are discontinuities or fractures in welded joints. They occur due to factors such as high residual stresses, improper welding techniques, or material defects. These cracks can compromise the structural integrity of welded components.
Welding cracks can be detected through various non-destructive testing methods such as ultrasonic testing, magnetic particle inspection, and dye penetrant testing. These techniques help identify cracks that may not be visible to the naked eye, ensuring the quality and reliability of welded joints.
Undetected welding cracks can lead to catastrophic failures of welded components under operational conditions. These cracks may propagate over time, compromising the structural integrity and safety of welded structures. Regular inspection and timely repair or replacement of cracked welds are essential to prevent potential accidents and ensure long-term reliability.
Catalog: Sheet Metal Fabrication Guide

This article was written by engineers from the BOYI team. Fuquan Chen is a professional engineer and technical expert with 20 years of experience in rapid prototyping, mold manufacturing, and plastic injection molding.


