PLA (Polylactic Acid) is a popular 3D printing filament known for its ease of use and versatility. However, achieving faster print times without compromising quality can be challenging. This article provides a comprehensive guide on how to adjust your PLA print speed for faster results while maintaining the integrity of your prints.

Why Speed Up Your 3D Printer?
As demand for 3D-printed items grows, reducing production time is crucial. Faster 3D printing enhances efficiency, allowing you to produce more items in less time, which is vital for large-scale production. It also lowers costs by reducing electricity and material usage, thereby decreasing operational expenses.
Increased print speed boosts productivity, enabling you to manufacture more items within a given timeframe. It is also better suited for handling larger or time-sensitive projects, making it essential for meeting tight deadlines and improving production efficiency.
This printer supports various materials like PETG/PET, ABS, and TPU. It achieves speeds up to 500 mm/s with 0.1 mm accuracy, perfect for both models and mechanical parts. Its 4.3-inch touchscreen offers an intuitive interface for easy control and real-time monitoring.
Normal Printing Speed of 3D Printers
In the FDM (Fused Deposition Modeling) field, the normal printing speed of 3D printers is typically around 50-60 millimeters per second for everyday medium-quality prints. Different materials may require different printing speeds; for example, PLA can be printed relatively quickly, while materials like TPU may require slower speeds to prevent issues. Entry-level printers typically have a maximum print speed of around 200 millimeters per second, but actual printing speeds are influenced by factors such as material type, movements of the print head, and acceleration.
What is PLA Print Speed?
PLA is a thermoplastic derived from renewable resources like corn starch and sugarcane. It melts at relatively low temperatures (around 180-220°C), making it an ideal filament for beginners and hobbyists. Print speed refers to how fast the printer’s extruder moves while laying down filament.
The ideal print speed for PLA depends on factors such as model size, 3D printer capabilities, and specific settings. Generally, speeds ranging from 40 mm/s to 60 mm/s are suitable for PLA printing.
PLA Recommended Printing Speed Ranges
General Speed Recommendations:
For most PLA printing, a safe starting point is between 40-60 mm/s. This range prioritizes print quality while maintaining a reasonable production time. It’s suitable for a wide range of models, offering a good balance between detail resolution and speed.
If your project involves intricate details or utilizes smaller nozzles (0.2 mm or 0.3 mm), consider starting at the lower end of this range (40-60 mm/s). This allows for better layer adhesion and finer feature definition, ensuring the intricate details of your model are accurately reproduced.
For less complex models or when speed is a priority over minute details, increasing the speed to 60-100 mm/s can achieve a faster print without significant compromises in quality. This range strikes a balance between reasonable print times and acceptable print quality for many applications.
When speed is paramount and slight quality compromises are acceptable, such as for large-scale models or prototypes, speeds of 100-150 mm/s can be considered. However, it’s essential to monitor print quality closely at these higher speeds to ensure structural integrity and surface finish are maintained.
Considerations Based on Nozzle Size
- Smaller Nozzles (0.2 mm or 0.3 mm): These nozzles require slower speeds (40-60 mm/s) due to their reduced filament flow capacity. Slower speeds allow for precise filament control and are essential for achieving intricate details and fine surface finishes.
- Standard Nozzles (0.4 mm): Most 3D printers come with a standard nozzle size of 0.4 mm, which offers flexibility in speed adjustment. Speeds can range from 40 mm/s for detailed prints to 100 mm/s for faster outputs while maintaining acceptable quality.
- Larger Nozzles (0.6 mm): Larger nozzles can accommodate faster speeds (60-150 mm/s) due to their higher filament extrusion rates. These nozzles are suitable for prints where speed is prioritized over fine detail, such as large prototypes or structural components.
Adjusting Speeds for Different Layer Heights
- Thicker Layers (0.2 mm or above): Thicker layers require less time per layer due to higher filament deposition, allowing for speeds typically above 60 mm/s. This is advantageous for speeding up prints while maintaining adequate structural integrity, suitable for prototypes or parts where fine detail is less critical.
- Thinner Layers (0.1 mm or below): Thinner layers demand slower speeds (around 40-60 mm/s) to ensure precise filament flow and proper adhesion between layers. These speeds are crucial for achieving fine details and smooth surfaces, necessary for models requiring high aesthetic or functional precision.

Factors Influencing PLA Print Speed
When optimizing PLA print speed, several factors come into play, each affecting how fast you can print while maintaining print quality. Understanding these factors helps in adjusting settings effectively to achieve faster print times without compromising the integrity of your prints. Here are the key factors influencing PLA print speed:
1. Printer Specifications
- The maximum speed at which your printer can reliably and accurately extrude filament is a critical factor. This is influenced by the quality of the printer’s components (such as stepper motors, belts, and rods), the design of the printer (CoreXY, Cartesian, Delta, etc.), and its overall build quality. Entry-level printers typically have lower maximum speeds compared to higher-end models.
- Acceleration and jerk settings. Acceleration refers to how quickly the printer can change its speed, while jerk (or junction deviation) determines how abruptly it can change direction. Higher values of acceleration and jerk can theoretically allow for faster print speeds by reducing the time spent on non-printing movements (like travel moves). However, excessively high values can lead to issues like ringing (ghosting) or layer misalignment, especially on less rigid printers.
2. Layer Height
- Layer height directly impacts print speed and quality. Thicker layers (e.g., 0.3 mm) require fewer passes to complete a print but result in lower surface quality and reduced detail. Thinner layers (e.g., 0.1 mm) produce finer details but increase print time. The choice of layer height depends on the desired balance between speed and quality for a specific print.
3. Print Settings in Slicing Software
- Slicing software allows you to adjust print speeds for different aspects of the print job:
- Outer Perimeters: Typically printed slower than inner perimeters for better surface finish.
- Inner Perimeters: Printed slightly faster than outer perimeters but slower than infill.
- Infill: Printed at a higher speed to reduce print time, though excessive speed can affect quality.
- Travel Speed: Determines how fast the nozzle moves between printing areas. Higher travel speeds reduce print time but should be balanced with acceleration and jerk settings to avoid mechanical strain.
- Slicing software also controls acceleration and jerk settings, allowing you to fine-tune these parameters to match your printer’s capabilities. These settings affect the smoothness and accuracy of motion during printing and should be adjusted carefully to minimize artifacts like ringing or layer shifting.
- Higher infill densities and complex infill patterns increase print time due to the additional material used and the complexity of the movements required. Simplifying infill patterns or reducing infill density can significantly reduce print time without sacrificing structural integrity, depending on the application.
4. Cooling
- Proper cooling is crucial for PLA prints, especially at higher speeds. Cooling fans positioned to direct airflow onto the freshly extruded filament help to solidify it quickly, preventing issues like drooping or warping. Slicing software often allows you to control fan speed and activation based on layer times or specific heights, optimizing cooling without excessive noise or energy consumption.
5. Filament Characteristics
- PLA typically prints well between 180-220°C. Higher temperatures can potentially increase extrusion rates, allowing for faster print speeds. However, too high a temperature can lead to issues such as stringing or oozing. Lower temperatures may improve print quality but may slow down the printing process due to reduced extrusion rates. Finding the optimal temperature for your specific filament batch is essential for balancing speed and quality.
- Using high-quality PLA filament with consistent diameter ensures smoother extrusion and reduces the risk of nozzle clogging or extrusion issues. Inconsistent filament diameter can affect extrusion rates and print quality, particularly at higher speeds.
6. Print Geometry and Complexity
- The complexity and geometry of the model being printed influence print speed. Intricate designs with many small details or overhangs typically require slower print speeds to maintain accuracy and prevent print failures. Simple geometric shapes or designs with fewer details can be printed faster without compromising quality.
7. Environmental Factors
- PLA filament properties are influenced by ambient conditions. Ideal printing environments typically range from 20-25°C with humidity levels around 20-50%. Temperature extremes or high humidity can affect filament behavior and print quality, necessitating adjustments in print settings to compensate.
Common Ways to Make PLA Print Speed Faster
Optimizing Print Speed
- Baseline Speed Settings: Start with the manufacturer’s recommended settings for PLA. Typical speeds range from 40 to 60 mm/s.
- Incremental Increases: Increase the print speed in small increments (e.g., 10 mm/s) and observe the results. Monitor for issues such as layer shifting, stringing, or under-extrusion.
- Adjusting Acceleration and Jerk Settings: These settings control how quickly the printer speeds up and slows down. Higher values can reduce print time but may cause mechanical stress or print defects.
- Acceleration: Gradually increase acceleration settings. Start with 500 mm/s² and test up to 3000 mm/s².
- Jerk: Adjust jerk settings cautiously. Standard values range from 5 to 20 mm/s.
Printer-Specific Adjustments
- Firmware Upgrades: Ensure your printer’s firmware is up-to-date to support higher speeds and advanced features.
- Direct Drive vs. Bowden Extruders: Direct drive systems handle faster speeds better than Bowden setups due to reduced filament retraction distance.
Slicing Software Settings
- Layer Height: Use a balance between speed and quality. For faster prints, 0.2 mm layer height is common.
- Wall Thickness: Reducing wall thickness can speed up prints but may compromise strength.
- Infill Patterns: Simple infill patterns like lines or grids print faster than complex patterns.
- Print Speed Settings: Adjust specific speed settings in your slicer:
- Outer Wall Speed: Lower than the main print speed for better surface finish.
- Inner Wall Speed: Slightly higher than the outer wall speed.
- Infill Speed: Can be set higher than wall speeds since it affects internal structure.
Cooling and Temperature Management
- Cooling Fans: Ensure your cooling fans are operating efficiently. Insufficient cooling can lead to poor layer adhesion and print defects at higher speeds.
- Extrusion Temperature: Increase the extrusion temperature slightly (5-10°C) to improve flow at higher speeds, but avoid overheating which can cause stringing and blobs.
Troubleshooting Common Issues
- Stringing: Increase retraction speed and distance, or lower print temperature.
- Layer Shifting: Check for mechanical issues, tighten belts, and ensure the printer is on a stable surface.
- Under-Extrusion: Ensure the nozzle is clean and the extruder is calibrated. Increase print temperature if necessary.
- Warping: Use a heated bed and adhesive aids like glue sticks or painter’s tape.
PLA Printing Speed Considerations
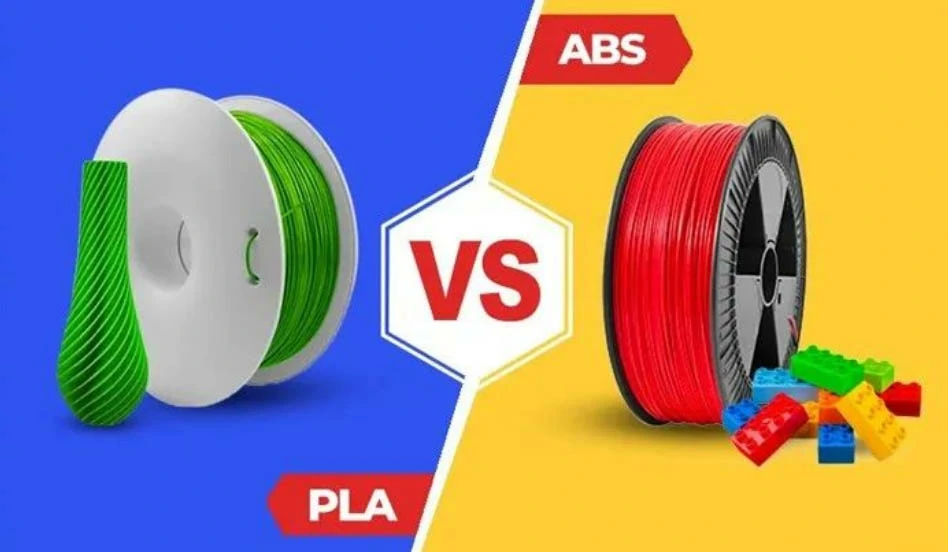
Polylactic Acid (PLA) is a popular 3D printing material known for its biodegradability, low toxicity, and ease of use. Compared to other commonly used thermoplastic filaments in 3D printing, such as ABS or PETG, PLA has a relatively low melting point, allowing users to achieve very high printing speeds.
High speeds can reduce print time but may lead to issues like poor adhesion between layers, stringing, or decreased surface quality. Optimal temperature settings (180-220°C) and effective cooling are essential to maintain print integrity. Adjusting speed based on model complexity and regularly calibrating your printer ensures consistent, high-quality results without compromising efficiency.
PLA Print Speed Settings for Your 3D Printer
Setting optimal print speed settings for your 3D printer involves fine-tuning several parameters to achieve the best balance between speed and print quality. Here’s a detailed exploration of key speed settings available in popular slicing software like Cura and Simplify3D:
Print Speed
Print speed is a fundamental parameter in 3D printing that dictates how quickly the extruder deposits filament to create each layer of the print. The optimal print speed varies depending on factors such as printer design, extruder capabilities, filament type, and nozzle size. Starting with manufacturer-recommended settings (typically between 40-60 mm/s for PLA) provides a baseline, but fine-tuning is necessary to balance speed with print quality.
Ideal Speed
Achieving the ideal print speed involves systematic testing and adjustment. Utilizing print speed test models that gradually increase speed allows for visual inspection of print quality at different settings. Signs of over-extrusion (bulging) or under-extrusion (gaps) can indicate that adjustments are needed. The goal is to find the highest speed that maintains consistent layer adhesion and surface finish without compromising structural integrity.
Travel Speed
Travel speed refers to how quickly the printhead moves between printing locations without extruding filament. Setting travel speed too high can cause issues like ringing (ghosting) due to sudden directional changes, while too low can unnecessarily prolong print times. Typical travel speeds for PLA range from 120 to 180 mm/s, ensuring efficient movement without sacrificing print quality.
Support Structure Speed
Adjusting support structure speed in slicing software is crucial for ensuring stable adhesion and facilitating easy removal post-print. Aligning support structure speed with print speed helps maintain structural integrity while simplifying support removal. Matching or slightly exceeding print speed settings ensures that supports are adequately bonded to the print without impacting overall print quality.
Retraction Speed
Retraction speed determines how quickly the filament is retracted into the nozzle when the printhead moves between print areas. Proper retraction settings (often set between 40-60 mm/s for PLA) prevent stringing and oozing, enhancing print quality by minimizing filament droplets during travel moves. Fine-tuning retraction speed optimizes filament control and reduces defects like stringing, ensuring clean, precise prints.
Additional Settings
Fine-tuning motion system parameters such as acceleration and input shaping enhances print stability and accuracy. Gradual acceleration adjustments minimize sudden movements and vibrations, crucial for maintaining print quality at higher speeds. Layer height adjustments (typically between 0.2-0.3 mm for PLA) balance print resolution with efficiency, ensuring detailed prints without compromising speed.
Infill Speed
Infill speed determines how quickly internal structures are printed, affecting print strength and time. Synchronizing infill speed with overall print speed ensures consistent layer bonding and structural integrity throughout the print. This setting optimizes print strength while maintaining efficient print times, essential for functional parts requiring both strength and speed.
Initial Layer Speed
Reducing initial layer speed (approximately 20-30% of print speed) enhances bed adhesion and establishes a stable foundation for subsequent layers. This gradual start minimizes warping and improves print quality, particularly for complex or large-scale prints where adhesion is critical. Adjusting initial layer speed optimizes print bed interaction, ensuring reliable first layers for successful print outcomes.
Shells
Adjusting shell settings influences wall thickness and surface finish. Incrementally increasing outer shell speed slightly compared to inner shell speed enhances surface quality without compromising print integrity. This approach achieves smoother finishes on outer layers, maintaining print strength and visual appeal.
Other Settings & Calibration
Fine-tuning cooling fan settings and bed temperature regulates heat distribution and promotes even cooling across layers. Adjusting the extrusion multiplier ensures consistent filament flow, critical for achieving uniform layer adhesion and print strength. Calibration of these settings ensures precise control over print quality and efficiency, adapting to printer upgrades and filament variations for continuous improvement.
Specific Speed Settings for Different Parts
- Outer/Inner Wall Speed: Adjusts the speed at which the outermost and innermost perimeters of the model are printed. Slower speeds (typically lower than default speed) for outer walls ensure better surface finish and dimensional accuracy.
- Top and Bottom Layers Speed: Controls the speed at which the top and bottom layers of the print are deposited. These layers are crucial for the print’s strength and finish, requiring careful adjustment to avoid issues like pillowing (uneven surface).
- Top Surface Skin Speed: Refers to the speed at which the topmost layer (skin) of the print is printed. Slower speeds may be preferred to achieve a smoother and more aesthetically pleasing surface finish.
- Skirt and Brim Speed: Sets the speed at which the initial skirt (priming line around the print) and brim (base around the print for better adhesion) are printed. Adjusting these speeds helps in optimizing print adhesion and filament priming.
Practical Considerations
- Material Compatibility: Different filament materials (e.g., PLA, ABS, PETG) may have varying optimal print speeds. Experimentation and adjustment of speed settings are necessary to achieve the best results with each material.
- Cooling Strategies: Effective cooling mechanisms (such as fan settings) should complement speed adjustments, especially for intricate prints or those with overhangs, to ensure proper solidification and minimize warping.
- Testing and Iteration: Fine-tuning print speed settings requires iterative testing and adjustment based on specific print models, printer capabilities, and environmental conditions. Regular calibration and monitoring of prints help in optimizing speed settings for consistent, high-quality results.
By understanding and adjusting these print speed settings in slicing software, users can optimize their 3D printing process to achieve efficient print times while maintaining the desired level of print quality and detail.
How Print Speed Affects Your Print
When determining print speed for your 3D prints, it’s crucial to strike a balance between efficiency and print quality. Here’s how print speed impacts your print and the potential risks associated with printing too fast or too slow:
Risks of Printing Too Fast
- Ringing or Ghosting:
Printing at high speeds can lead to ringing or ghosting, characterized by rippled or wavy surfaces on your print. This defect occurs due to excessive vibrations or uncontrolled printhead movements caused by rapid speed changes. - Poor Layer Adhesion:
Excessive print speeds can compromise inter-layer adhesion, affecting the strength and integrity of the printed part. Slower speeds, especially on initial layers, promote better bonding between layers and with the build plate. - Under-Extrusion:
If the print speed exceeds the flow rate of filament through the nozzle, under-extrusion may occur. This results in gaps, holes, or missing layers in the print due to insufficient material being deposited. - Clogging with Flexible Filaments:
Flexible filaments like TPU or TPE require slower and more consistent print speeds to prevent bending or jamming in the extruder. Fast speeds can cause these materials to deform or clog the nozzle.
Risks of Printing Too Slow
- Overheating and Deformations:
Printing too slowly can cause filament to remain in the nozzle for extended periods, leading to overheating. This can result in deformations on the printed part, affecting its surface finish and dimensional accuracy.
Finding the Optimal Print Speed
Balancing print speed is essential for achieving high-quality prints:
- Experimentation: Adjust print speeds incrementally to find the optimal balance for your specific printer, filament type, and model complexity.
- Consideration: Prioritize slower speeds for critical features like initial layers and outer walls to ensure proper adhesion and surface finish.
- Monitoring: Regularly monitor print quality and adjust speeds accordingly to mitigate defects and optimize print outcomes.
By carefully managing print speed settings, you can enhance both the efficiency and quality of your 3D prints, ensuring successful outcomes with minimal defects.
Print Speeds for PLA and Other Filaments
Print speeds can vary significantly depending on the type of filament you are using in your 3D printer. Here’s an overview of recommended print speeds for PLA and other common filaments:
| Filament Type | Overall Print Speed (mm/s) | Initial Layer Speed (mm/s) | Infill Speed (mm/s) | Notes |
|---|---|---|---|---|
| PLA | 50-80 | 20-30 | 60-80 | Higher speeds achievable with good cooling systems |
| ABS | 40-60 | 20-30 | 50-70 | Slower speeds to minimize warping |
| PETG | 40-60 | 20-30 | 60-80 | Better layer adhesion than ABS |
| TPU/TPE | 20-40 | 15-25 | 20-40 | Very slow speeds to prevent jamming |
| Nylon | 30-50 | 20-30 | 40-60 | Slower due to high printing temperature |
Related resources: 3D Printing With ABS vs PLA: Differences and Comparison
Key Considerations:
- Overall Print Speed: Adjust based on printer capability and desired print quality.
- Initial Layer Speed: Slower speeds enhance bed adhesion.
- Infill Speed: Can be higher than outer wall speeds to optimize print time.
- Notes: Cooling and layer height adjustments also impact print quality and speed.
Adjust these settings based on your specific printer, filament brand, and environmental conditions for optimal 3D printing results.
Finding the Best Print Speed: Using Print Speed Test Models
A reliable method to determine the optimal print speed for your 3D printer and filament combination is by utilizing a print speed test model, often referred to as a print speed tower or test cube. These models help in assessing print quality at different speeds, enabling you to fine-tune settings for optimal results.
How Print Speed Test Models Work
- Design and Setup:
Print speed test models are designed with multiple sections, each intended to be printed at a different speed. These speeds are typically indicated on each section of the model, ranging from low to high values in mm/s. - Printing Process:
- Slicing Settings: Import the STL file into your slicing software (e.g., Cura, PrusaSlicer).
- Speed Variation: Adjust print speed settings in the slicer to correspond with the labeled sections of the model. For example, if the model has sections labeled 40 mm/s, 60 mm/s, 80 mm/s, and 100 mm/s, set your slicer accordingly.
- Printing: Print the model using the adjusted speed settings. Each section of the tower will showcase how well the printer handles print quality at different speeds.
- Evaluation:
- Visual Inspection: Examine the finished print tower to identify any degradation in print quality as speed increases. Look for issues like ringing, layer misalignment, or surface imperfections.
- Comparison: Compare the quality of each section to determine the highest speed at which your printer maintains acceptable print quality for your standards.
Where to Find Print Speed Test Models
- Online Repositories: Visit platforms like Thingiverse, MyMiniFactory, or Cults3D to download STL files specifically designed for print speed testing.
- Community Recommendations: Seek recommendations from 3D printing forums or communities for popular and effective print speed test models.
Benefits of Using Print Speed Test Models
- Optimization: Allows you to pinpoint the ideal print speed settings for your specific hardware (printer) and material (filament).
- Time Efficiency: Saves time by systematically testing and adjusting speeds without compromising on print quality.
- Precision: Provides empirical data to inform future print settings, ensuring consistent and high-quality 3D prints.
By leveraging print speed test models, you can efficiently optimize your 3D printing process, achieving faster print times while maintaining the desired level of print quality and detail.
High Speed PLA vs. Regular PLA: A Comparative Analysis
High Speed PLA and Regular PLA are two variants of the same material, but they cater to different needs and printing conditions. Here’s a comparative analysis of both:
| Aspect | High Speed PLA | Regular PLA |
|---|---|---|
| Extrusion Rate | Faster melting and extrusion | Standard extrusion rate |
| Print Speed | Supports faster print speeds, excels at speeds up to 350 mm/s with superior surface quality and detail. | Moderate print speeds (40-60 mm/s) |
| Print Quality | Slightly reduced detail in intricate prints | Better detail and precision |
| Application | Larger, less detailed prints | Versatile across various applications |
| Adhesion | May have slightly lower layer adhesion | Good layer adhesion |
| Surface Finish | Acceptable, but may not match regular PLA | Excellent surface finish |
| Versatility | Limited to applications where speed is key | Suitable for a wide range of print settings |
| Cooling Needs | Requires effective cooling management | Requires adequate cooling |
| Stability | Stable performance across different printers | Stable and reliable performance |
Melt Flow Index (MFI)
Melt Flow Index (MFI) is a key parameter that helps differentiate High Speed PLA from its regular counterpart. The Melt Flow Index (MFI), also known as Melt Mass-Flow Rate (MFR) or Melt Index (MI), is a measure of the ease with which a thermoplastic material, such as PLA (Polylactic Acid), can be extruded under standardized conditions. It quantifies the flowability of the material when subjected to heat and pressure, which is crucial for understanding its processability in various manufacturing methods, including injection molding and extrusion processes like 3D printing.

Why Choose High Speed PLA for Fast Printing?
Choosing High Speed PLA for fast printing is advantageous due to its ability to facilitate quicker extrusion and rapid cooling, essential for maintaining print quality at accelerated speeds. This efficiency is particularly beneficial for projects requiring rapid prototyping or large-scale production where time is critical. High Speed PLA’s higher melt flow index ensures smooth extrusion, reducing the risk of extrusion issues like clogs. Its quick cooling properties further preserve structural integrity during fast printing, accommodating varying printing conditions while maintaining stability and consistency. These qualities make High Speed PLA a versatile and cost-effective choice for applications demanding both speed and quality in 3D printing.
High-Speed PLA: Enhancing Speed in PLA Filaments
High-Speed PLA filaments are specifically engineered PLA formulations designed to optimize 3D printing speed while maintaining the inherent benefits of standard PLA, such as biodegradability and ease of use. These formulations typically incorporate additives or modifiers that enhance melt flow characteristics, enabling smoother extrusion at higher speeds. This improvement is achieved through additives that may enhance heat conductivity or reduce viscosity, facilitating quicker heating and melting within the printer’s hotend.
However, it’s important to note that while high-speed PLA filaments promise faster printing capabilities, the actual speed gains may vary and are often marginal. In many cases, a high-quality standard PLA filament can achieve similar or better results in terms of print quality and reliability.
Here are some popular examples of high-speed PLA filaments:
- eSun ePLA-HS High Speed Printing PLA 3D Printer Filament
- MatterHackers MH Build Series High Speed PLA-HS Filament
- SUNLU HS_PLA (High Speed PLA) 3D Printer Filament
When considering high-speed PLA filaments, it’s advisable to test and calibrate settings to optimize performance for your specific printer and printing conditions. While these filaments offer potential benefits in speed, their effectiveness may vary depending on the specific application and printing environment.
Risks of Printing Too Slow
Printing too slowly on a 3D printer can indeed lead to several issues, despite the generally accepted notion that slower speeds often result in higher print quality. Here are the risks associated with printing too slow:
Overheating and Deformations:
- Filament Overheating: When filament remains in the hotend for extended periods at low speeds, it can heat up excessively. This can lead to filament degradation, resulting in poor extrusion quality and potential clogging of the nozzle.
- Part Deformations: Excessive heat buildup can cause deformations in the printed part, such as warping, curling, or sagging of features. This compromises the dimensional accuracy and overall quality of the print.
Excessive Dwell Time:
- Residence Time: Slow printing speeds increase the residence time of filament in the hotend. This prolonged exposure to heat can alter the material properties and affect its ability to flow smoothly, resulting in inconsistent extrusion and surface imperfections.
Layer Bonding Issues:
- Poor Adhesion: Insufficient filament flow and cooling at slower speeds can lead to poor layer adhesion. This manifests as weak bonds between layers, compromising the structural integrity and strength of the printed object.
Print Quality Trade-offs:
- Surface Finish: While slower speeds can sometimes improve surface finish by allowing layers to cool more evenly, excessively slow speeds may introduce visible defects like blobbing, stringing, or rough textures due to inadequate material flow.
Conclusion
Optimizing PLA print speed involves a careful balance between multiple factors including printer capabilities, slicing settings, and temperature management. By making incremental adjustments and monitoring the effects, you can achieve faster print times without sacrificing the quality of your prints.
BOYI is your partner in unleashing creativity and innovation through efficient and precise 3D printing solutions. Whether you need rapid prototyping, custom part production, or artistic creations, we tailor our services to meet your unique needs. Contact BOYI today to turn your ideas into reality with cutting-edge 3D printing solutions.

Let’s Start A New Project Today
All information and uploads are secure and confidential.
FAQ
Start with a baseline speed of around 50 mm/s, which is generally considered a safe starting point for most PLA filaments and printers. Adjust from there based on your printer’s capabilities and the desired balance between speed and print quality.
Watch for signs of print quality degradation such as stringing, layer shifting, or inconsistent extrusion. These issues may indicate that the print speed is too high for your current settings. Gradually increase speed in small increments and observe the results to find the optimal balance.
Yes, you can optimize print speed by adjusting settings within your slicing software. For example, outer walls might print slower for better surface quality, while infill and inner walls can print faster to reduce overall print time. Experimenting with variable speed settings can help achieve efficient and high-quality prints.
Catalog: Materials Guide

This article was written by engineers from the BOYI team. Fuquan Chen is a professional engineer and technical expert with 20 years of experience in rapid prototyping, mold manufacturing, and plastic injection molding.